
Mk handmade soap. Master class, soap making. Soap making recipes at home for beginners
The secret of how to make handmade soap is not known to everyone. Otherwise, the business of selling natural soap would not bring such profit and people would not bring a new odorous bar of magical action from each business trip.


Among the advantages of handmade soap is not only the purity of the product, but also the uniqueness and individuality. You can independently select and add to the bar those nutritional components that a certain type of skin needs. If you give a gift to a teenager, you need to take into account the increased likelihood of acne. Men need to soothe their skin after shaving. And confident women need to give along with soap care for the skin, youth and freshness.
Required Ingredients
To make your own soap, you need to purchase the necessary components:
- Soap base (special transparent or regular baby soap).
- Any base vegetable oil (olive, apricot, sunflower, almond or others).


- Essential oil, depending on the characteristics of the skin type (ylang-ylang is suitable for sensitive skin, tea tree, aloe for problematic skin, orange, grapefruit for cellulite).
- Dishes for dissolving soap and molds for hardening.
- Alcohol for bonding layers and lubricating the mold surface.
After preparing all the components, you need to start soap making.


We start to conjure
First, the soap base is grated so that it melts faster in a microwave or water bath. Base oil is added at the rate of 3 teaspoons per 100 grams of base.
Milk, cream or water is added while the base melts to obtain a creamy mass. Too much water causes the soap to delaminate, so it's best to add sugar to help the base melt faster.


Soap is poured into a mold and sprinkled with alcohol so that there are no air bubbles on the surface. Leave in the refrigerator or other cool place for 2-3 days until completely dry. It remains only to take it out of the mold and give it to a loved one.
Everyone can make such soap on their own at home.


Advice!So that the finished soap does not deform while it is delivered to the recipient, it must be wrapped with cling film on top.
Master class with step-by-step photos on making handmade soap


Better than flowers, only a bouquet of handmade soap
If you don’t know what original gift to give to a friend, mother, mother-in-law, lover, always remember that a hand-made gift is most appreciated. Given the love of women for flowers, these two points can easily be combined and get the perfect bouquet - from handmade soap.


If desired, you can make a bouquet of any number of flowers. Given that roses are considered universal, they need to learn how to make them first. Knowing the basics, you can easily make any other flower. To make soap roses you will need:
- 200 grams of baby soap;
- 1 tablespoon of edible gelatin;
- 7-8 tablespoons of water;
- flavors, food coloring is desirable to use for similarity with a rose;
- smooth knife;
- vegetable peeler.
Gelatin is poured with cold water and left to swell for half an hour - 50 minutes. At this time, baby soap is rubbed on a grater and, constantly stirring, melted in a microwave oven or in a water bath until smooth. At this stage, flavors and cosmetic oils are added.


Add the already swollen gelatin to the mixture and pour the soap into various forms (hairspray caps, baking dishes, empty cases for watercolors or cosmetics are suitable). It is better if the containers are silicone, since soap in its original form cannot be obtained from glass or metal. Put the resulting mass for 10-15 minutes in the refrigerator until hardened.
Soap rolls will come out slightly damp and still warm. Use a paring knife to remove thin round layers of soap. These are the petals for the future rose. They can be of different shapes and sizes. That's the beauty of it. To create the core, you need to twist one soap petal a little diagonally. The next few petals need to wrap the core.


To make the rose look blooming, you need to wrap the edges of the next petals a little outward. Continue until you get a flower of the required splendor. If the cone is too oblong, it can be cut off with a knife.
Bouquet leaves are made of soap in the same way as flowers, but in a different color. The veins are drawn with a toothpick or a needle.
A rose with a leaf can be made into a separate flower to make a bouquet. And you can use it to decorate a bar of soap. It all depends on the desire of the master.
Advice! Soap flowers are a great gift, because they can not only wash, but also put in the bathroom for decoration. Thanks to gelatin, roses will be fragrant from humidity and cheer up the hostess.
How to draw on soap
Handmade soap with a pattern is one of the most original gifts that seems to be very difficult to make at home. If you choose a drawing that is close in spirit to the person to whom the product will be presented, or even his photo, you will present not just hand-made soap, but a work of art in which the soul is invested.


First of all, you need to choose a thematic picture and print it on a special water-soluble paper. It would be better if you use a color laser printer, as it accurately conveys all the colors that are not distorted during further manipulations. Before starting work, the drawing must be well dried and sprinkled with hairspray.
Soap base or baby soap should be melted in a microwave oven or in a water bath so that there are no air bubbles. Dyes and flavors are not added to this layer, as they reduce transparency, which is necessary for image clarity.
The resulting melted soap is poured into a pre-selected form with a layer 2 mm thick and the picture is placed on top with a pattern down. To avoid air cavities, you need to immediately determine the location of the printout. From above it must be evenly sprinkled with alcohol and pour a 1.5 mm layer of soap on top. This is done so that the white layer does not spoil the picture if it leaks under it. Alcohol treatment is necessary to eliminate bubbles on the surface.


The next layer is white. It shows the picture best. Therefore, a little soap in the form is melted so that it is enough and poured on top of the already frozen transparent layer treated with alcohol. After complete solidification, the next, thick layer can be originally decorated using soap chips, sparkles, coffee beans, dried flowers or other decorative elements. If a chip is selected, it must first be frozen for strength so that it does not melt when it is poured into the next hot layer.
Advice!You can add a different number of multi-colored layers, depending on your imagination, but the main thing is not to overdo it, as the layers may not stick together.
Step-by-step master class for making colorful soap


How to make handmade soap with inscriptions: cute, fast, cheap
To reach the heart of a loved one or just cheer up a friend, you can give an original handmade soap with a relevant, meaningful for you or a person, inscription. Experts distinguish two main ways of decorating a product.
To implement the first method, you need to pour a small amount of pre-melted baby soap on cling film and let it harden a little. On this basis, they cut out with a sharp object, preferably with a needle or a toothpick, the letters needed for the phrase. After complete solidification, the base easily moves away from the film. The main thing to remember is that you need to write letters in a mirror image, since the front of the soap will be at the bottom of the form.
 Attach the stencil to the finished bar of soap, take a sharp object, such as a wooden skewer, and circle the letters
 The second method involves the presence of a ballpoint pen and plain paper. It looks a little cheap if it's not neatly written. You need to write the phrase in bold type and fill it with a thin layer of soap base. After hardening, the inscription easily remains on the soap, and the paper is torn off with a sharp movement. After the manipulations, the printed phrase is placed in a soap mold and poured a second time with a melted base. In order for the layers to stick together, do not forget about the treatment with alcohol.
Advice! To make the gift touching and individual, it is better to choose a meaningful phrase for a person. This will indicate your attention and understanding.
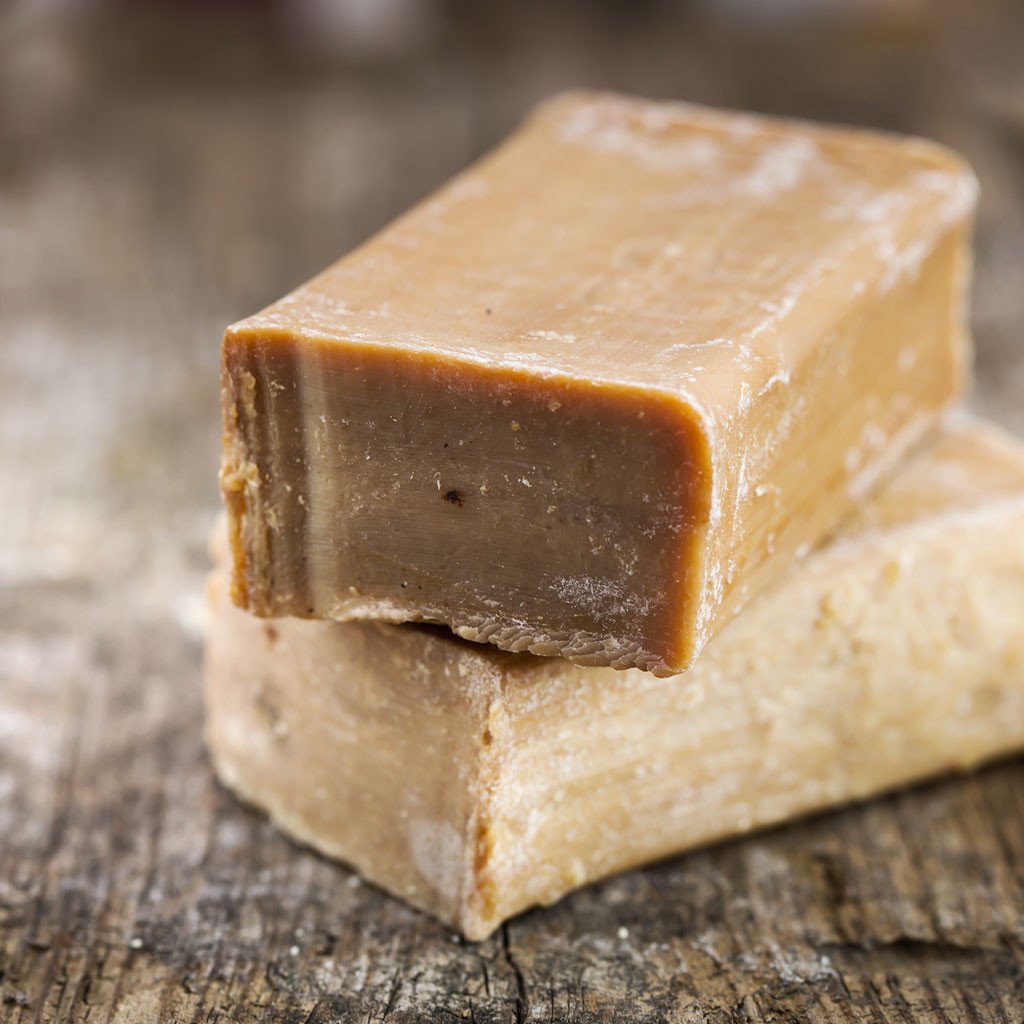
Useful properties of laundry soap in handmade soap
Laundry soap in the 21st century has lost its popularity due to its unattractive appearance, smell, and shape. However, everyone over 30 knows about the beneficial properties of the brown substance:
- suitable for washing;
- kills bacteria;
- improves the condition of the hair;
- considered a folk remedy for the treatment of acne and acne;
- treats inflammatory processes and gynecological diseases;
- disinfects the wound from infection;
- eliminates fungus.
There are three methods of soap making based on laundry soap.
One of them is a three-layer kitchen one - it eliminates any contamination, including greasy stains and food residues on a plate. The main rule of use is to wear gloves, as the product dries the skin.
To prepare kitchen soap, you need to take 100 grams of laundry soap, grate it, pour 180–200 ml of water and melt it in a microwave oven or in a water bath. When the resulting liquid resembles honey, beat it with a mixer at low speed. Collect the foam in a separate bowl. The mass, which has already been melted, is divided into three parts. In the first add a tablespoon of mustard powder, in the second - 2 tablespoons of coffee grounds, which will get rid of the unpleasant odor, and a spoonful of castor oil.
To glue two bars of soap, you need to sprinkle the first layer with alcohol and pour the second one on top of it. Alcohol also eliminates air bubbles.
The third layer with soda to enhance the cleansing effect. It is mixed with the foam that remained after the first whipping of laundry soap and a tablespoon of soda. When laying out this layer on the previous one, do not forget to moisten it with alcohol.
Soap in the form of hearts - a nice gift for loved ones Leave handmade soap to dry for at least a week. There will be no characteristic smell, the cleansing properties will increase several times.
The second way to make handmade soap will appeal to girls who care about the condition of the skin, as this product nourishes and moisturizes it. It is necessary to dissolve 150–200 grams of laundry soap and mix thoroughly with the ingredients in the amount of one tablespoon of honey, sunflower, sea buckthorn and castor oil, 100 ml of boiling water and one dessert spoon of apple cider vinegar. After obtaining a homogeneous mass, add 1 teaspoon of anti-cellulite oil, chlorophyllipt, vitamin E and 0.5 teaspoon of glycerin or baby cream.
For a pleasant smell, add 10 drops of lavender essential oil or men's toilet water to the soap. After cooling, it is enough to place in the freezer for only one hour. Then you can use.
The third recipe contains milk, so the soap is excellent for delicate and sensitive skin.
80 ml of milk is mixed with 100 grams of laundry soap, previously grated, and the mixture is melted in a microwave oven or in a water bath, stirring occasionally. To speed up the process, add 1 tablespoon of honey. When the soap dissolves, beat it with a mixer until light and cool.
In a mass that has already cooled down, you need to add a tablespoon of apple cider vinegar, olive oil, castor oil and vodka. Almond essential oil helps to completely remove the aroma of laundry soap, but it is contraindicated for pregnant women and children under 6 years old, so it is better to use chocolate, cocoa, ginger, cinnamon and other aromatic additives.
Advice! To make the soap foam well, you need to add coconut oil or other vegetable fats to the composition.
Pay attention to soap making and prepare a natural product at home, which, with the right ingredients, can be used in cosmetology. In addition, this is a great gift if it is additionally decorated with natural ingredients: flower petals, fruit pits, glitter and pigments. In stores, such soap is very expensive, much cheaper and easier to make it yourself. You can attract loved ones to work - it will be a joint and exciting work. Today, in the editorial review of the site, there are fascinating master classes for beginners, during which you will get acquainted with the basic techniques of soap making.
Beginners need to start making soap at home with a soap base. You can buy a ready-made composition, use remnants or ordinary soap. The first copies are best cooked without any additives, and over time, experiments can begin.
What you need to prepare for soap making at home
Before making soap at home, you will need the following components and tools:
- base vessel;
- beautiful molds;
- cups, spatulas or spoons;
- alcohol.
Advice! Plastic or enameled dishes are suitable for soap making, metal surfaces harm essential additives.
We will also need the following ingredients:
- ready-made soap base, which can be bought in granules, a piece or in shavings. For manual production, alkaline soap is sometimes used, which includes only oils;
- oils that affect the aroma and properties of the finished sample.
The following ingredients are often used as a supplement:
- abrasive substances;
- oil vitamins;
- bee products, such as honey;
- culinary spices;
- corn starch and sugar - they are necessary for better lathering and foaming;
- fruit and vegetable juices and yogurt are needed to give a moisturizing effect.

How to make soap at home: a master class for beginners
We suggest that you familiarize yourself with the principle of independent soap making in the manufacture of a simple recipe.
| Illustration | Action Description |
 | Cut the base, put everything in a plastic jug and put in. |
 | Pour the warm base into a measuring cup, add the dye and mix. |
 | Add 12 drops of fragrance, mix. |
 | Pour in a little glitter and mix thoroughly. |
 | Pour into a silicone mold. To prevent the appearance of bubbles, it is necessary to immediately spray the surface with alcohol. |
Remove the finished soap for 2-3 hours in a cool place, but not in, after which it can be removed from the mold.
In more detail, a master class on soap making at home for beginners can be viewed on the video:
Step by step homemade soap making recipes for beginners
Beginners can try their hand at very simple recipes, and after that experiment with more complex compositions.
Recipe 1 - surprise with rose petals
Before making 2 bars of soap at home, we need:
- 150 g base;
- red dye;
- jojoba and rose oils;
- flower petals.
The work process is the following.
- Cut and melt in the microwave base.
- Pour 3-4 drops of dye, 15 drops of jojoba and 2-3 drops of rose oil.
- Put the petals on the bottom of the silicone mold and pour the prepared base. If necessary, you can use a spatula to distribute them evenly over the shape.


Recipe 2 - honey soap
To cook fragrant soap with honey, we need:
- 150 g base;
- Saffron - it will act as a dye;
- oils: vanilla "Monoi de Tahiti";
- 2 tbsp. l. honey;
- honeycomb molds.
Manufacturing order.
- Melt the base in any convenient way.
- Add a pinch of saffron and honey, mix everything.
- After the saffron colors the composition, add 2 drops of vanilla oil, then a little Monoi de Tahiti, mix, if necessary, increase the dosage.
- Pour into molds and chill.


Recipe 3 - Soap "Strawberry with Cream"
This is a more complex recipe, for it we need:
- the basis;
- 0.5 teaspoons of oils: olives and strawberry seeds;
- red dye;
- 40 g cream;
- aromas of strawberry and cream.
The procedure is complicated by the inclusion of a natural product at the end of mixing, otherwise the course of action is similar.


Recipe 4 - Chocolate Aroma Soap
For fragrant chocolate soap you will need:
- 40 g cocoa butter;
- 150 g base;
- 40 g of sugar;
- chocolate aroma;
- molds resembling tiles.
Prepare the base, add all the oils and flavoring, mix and pour into molds.


How to make soap at home "from scratch" using a cold and hot method
Handmade soap is an eco-friendly product, which contains only natural ingredients. It can be adapted to any skin type and needs, in addition, it is much cheaper and more useful than store-bought. For many, such a hobby turns into an income category, it is important to understand the principle of soap making and study the effect of the components on the body.
Safety precautions for making soap at home from scratch
Before you do soap making at home with your own hands, you need to clearly know and follow the safety precautions:
- since all work is done with a hot base, children are better controlled;
- for work it is necessary to allocate a separate dish;
- when working with alkali, flavors and dyes, use a respirator, gloves, goggles, clothing should completely cover the body;
- before work, cover with film or newspapers;
- in case of contact with the alkaline composition on the skin, it is necessary to thoroughly rinse it under running water with a 9% solution of vinegar.

What you need to make soap at home from scratch: preparing the basic tools
For soap making, it is necessary to prepare various rubber, silicone or plastic molds that will give an unusual look to fragrant pieces. It can be:
- culinary molds;
- children's forms for the sandbox;
- special molds for making soap at home;
- immersion thermometer blender.
Ready-made pieces in the form of fruits, animals or various geometric shapes look unusual. As additional components, dried inflorescences, ground, salt are often used, which give a scrubbing effect.

How to make soap at home "from scratch" in a cold way
There are two ways to make soap at home: cold and hot, a novice craftswoman should try both and decide which one suits best.
The peculiarity of cold soap making is that the base does not heat up, alkali and water are used as a reagent.
The order of work consists of the following steps.
- Pour lye into a container with ice water. Even pieces of ice may be present in the liquid. In the cold method of making soap, deviations from the recipe are not allowed.
- After mixing the parts, it is necessary to wait for the end of the reaction, then pigments and oils can be added to the viscous mass. Their temperature should not differ from the base by more than 10 °; for this, a thermometer is used for. If necessary, the components are heated in a water bath or in. Flavors can be added at the very end.
- Mix with a blender until the consistency of sour cream is reached and pour into a mold.
- It will take at least 24 hours to completely solidify, after which the blanks must be wrapped in cling film.

How to cook soap "from scratch" at home in a hot way
The hot method of making soap from scratch at home is to mix alkali and water, the procedure is similar to the cold one. Further, the process is carried out as follows.
- Close the container with a lid and put in a water bath on a very small fire, stirring every 30 minutes.
- After 3-4 hours, the gel-like mass is ready for further action, it should not stick to the hands.
- Add pigments and flavors, mix and pour into molds.
- After 24 hours, the soap is removed from the molds and left for 1-2 weeks until completely solidified.

Master classes with recipes for beginners for making soap from scratch
Cold and hot methods differ in the “ripening” period, so if you plan to do it, you need to prepare in advance. We offer, according to our recipes, to cook at home “from scratch” a few simple, but at the same time, original bars of soap.
Recipe 1 - invigorating mint soap
To make 200 g of cold soap you will need:
- electronic balance;
- 17.5 g alkali;
- 14.01 g coconut oil;
- 56.05 g olive oil;
- 70.06 g palm oil;
- 42.03 g of water.
Let's consider the whole process in more detail.
| Illustration | Action Description |
 | Measure the lye into a separate container. |
 | Pour lye into ice water and mix thoroughly. |
 | Measure all the oils into a container and heat them in the microwave. |
 | Pour an alkaline solution into a mixture of oils, their temperature should not exceed 42 °. |
 | Mix the composition with a blender, it homogenizes the mixture faster. 30 seconds is enough for a liquid trace, 10 minutes will be needed to obtain a creamy mass. |
 | Divide the composition into 2 parts, add titanium dioxide to one of them for discoloration. |
 | Add mint oil to both parts and mix thoroughly. |
 | In one part, which has a yellow tint, add blue dye to give it a green color and mix. |
 | Add blue dye to the bleached part and mix. |
 | Put both parts of the composition into the mold in random order and tamp. |
 | Apply sea waves to the surface with a spatula and leave the soap for 24 hours to harden. |
 | Remove the soap from the mold, cut in half and leave to harden for 1 month. |

Recipe 2 - unflavored baby soap with glycerin
In a cold way, you can prepare baby soap, the recipe of which will be gladly adopted by young mothers. For this we need:
- 300 g olive oil;
- 120 g of lanolin and glycerin;
- 175 g of chamomile decoction and shea butter;
- overfat according to this recipe is no more than 10%;
- 60 g sodium hydroxide.
The order of work is the following.
- Mix the oils, prepare a solution with lye and pour it into the oil mixture. The temperature of each composition should be 37-42 °.
- Bring the mixture to a thick trace with a blender.
- Divide into molds and leave overnight to set. After 24 hours, transfer the pieces to polyethylene until the reaction is completed for another 1 month.


Recipe 3 - Jasmine Soap
We will prepare the next soap in a hot way. Before you make soap from scratch, you need to create a recipe in a special soap-making program.

Let's take a closer look at the step-by-step master class.
| Illustration | Action Description |
 | Measure 150 g of palm oil, 128 g of palm kernel oil, 113 g of coconut oil, 23 g of stearic acid into a plastic container and place in a water bath or in |
Soap making is one of the most common types of needlework today. If a couple of years ago it was difficult to find materials and raw materials for soap making, today you can find everything you need in soap making stores. However, a store is not the place to start your acquaintance with soap making. For starters, it’s worth reading review articles for beginner soap makers. If possible, it would be useful to attend 1-2 master classes in creative studios or soap shops. Most often these are paid events. On average, 1 visit will cost 800-1500 rubles. Promotions are periodically held on discount services, under the terms of which you can buy a visit to a soap-making master class for 400-600 rubles. 1-2 visits to such master classes allows you to learn about the basics of soap making in practice. In theory, you can learn a lot from this article.
The soap making process requires certain specific tools and materials, most of which can be purchased at specialized stores. Some materials are easier and cheaper to find in hardware stores and pharmacies.
Soap making tools
To make soap, you will first need a water bath. In general terms, a water bath is a container that will stand on the stove. Water is poured into it. Another container will be placed directly in the container with water. The second container must be made of a material that is resistant to high temperatures. In fact, a water bath is usually a ladle or a small saucepan in which a glass of heat-resistant glass is placed.
Soap making materials
In the glass itself is the basis for the future soap. It is crushed for faster melting. The basis for soap is divided into categories depending on indicators such as:
- color;
- compound;
- manufacturer country.
By color, until recently, the base was divided into white, transparent and translucent (with the addition of base oil). Recently, a base for soaps of different colors has appeared. According to the composition, the base is mainly divided into the base without sodium lauryl sulfate and with it. Soap base producing countries that can be found most often are England, Russia, Germany.
To give the future soap color and smell, you will need dyes and flavors. Dyes are food and cosmetic. Cosmetic dyes add variety to the appearance of soap. These are glitters, sparkles, mother-of-pearl, etc. Flavors are identical to natural (perfumes) and natural (essential oils). Perfumes hold smells longer, but at the same time have less pronounced notes of aroma. Essential oils fade faster, but the richness of the aroma is superior to fragrances.
To give the future soap special properties, base oils are added. Thanks to them, soap can become moisturizing, softening the skin. Some oils can even help with a number of cosmetic problems, such as acne, oily skin, or, conversely, dry skin.
Sometimes various fillers are added to the soap, which can either be decorative elements or become prophylactic components that give the soap certain cosmetic effects. Decorative elements - dried flowers, loofah, spices, etc. Cosmetic components - scrub components, sea salt, cosmetic clay, etc.

Other materials and tools needed for soap making will be discussed later in the description in general terms of the soap making process.
In general terms, the soap making process is as follows:
- First, prepare all the necessary components and tools for future soap. This is necessary, because in the course of making soap it will be necessary to do everything quite quickly.
- Then a water bath is placed on the stove. The stove is turned on at medium power.
- The soap base is crushed into small cubes and placed in a glass of heat-resistant material.
- After the base becomes liquid, flavoring and dye are added to it. Other fillers can be added as desired. Base oil is also added at this stage.
- The liquid base is poured into a soap mold. A few words about soap molds. Depending on the material, they can be plastic or silicone. Depending on the shape, they can be flat and voluminous. By purpose, they can be special soap molds, ice molds, baking molds, chocolate molds.
- Next, the base is allowed to harden, and then the soap is removed in the refrigerator until completely solidified.
- The finished soap is carefully removed from the soap mold and packed in cling film. This helps to keep the soap from quickly weathering the smell and from minor scratches and other deformations during its transportation.
- The finished soap must be given time to mature. Usually this period lasts 2-3 days. After that, the soap can be used or given to someone. For a gift, it is worth packing the soap in a festive package.

How much to weigh in grams?
On average, about 40 (small molds) - 100 (large molds) g of base are used for one soap.
Dye is added as much as necessary to obtain a certain color saturation. Start with 1 drop, and then increase the concentration to the desired shade.
Flavorings are added in the amount of 5-7 drops, essential oils are added in different amounts (from 1 drop to 5-7) - depending on how bright the smell is.
Base oil is added about 1-2 ml per 100 g of base.
- Only dried flowers and herbs should be used as fillers. Otherwise, rotting processes may occur inside the soap and mold may appear.
- During the manufacture of multi-layer soap, it is necessary to make cuts in the solidified layer before pouring the next layer and spray with alcohol or a liquid to remove bubbles.
- If air bubbles appear in the liquid base during melting or on the surface after pouring, then they need to be sprayed with a liquid to remove bubbles (alcohol). Important! Vodka will not help for these purposes - a water coating forms and air bubbles still remain.
- Before pouring the liquid base into a plastic soap mold, lightly grease the mold with oil. This will help to easily separate the finished soap from the mold.
- Mixing colors to get the desired shade is not worth it, as the result may be unexpected.
- It is also better not to mix fragrances in soap or mix them carefully. Before adding to the soap, try sniffing the scented bottles together. This will help to assess the possibility of the existence of these smells in harmony.
- It is necessary to heat the soap base in such a way that the water does not boil in a water bath.
- When making soap, it is better to take a little more than the basis by weight for melting the soap. The excess soap base can be poured into prepared small soap molds.
- Imperfections, failed soap, excess and hardened soap on a glass glass can be used as a soap filler.
- Soap should be kept in the refrigerator for no more than 10-15 minutes.
- Ready soap must be stored in a dry place, away from direct sunlight and moisture.
Any decorative thing created by one's own hands can decorate the house, make it cozy. What to say about items that have a wide practical application in everyday life. For example, hand-brewed soap will not only perfectly cope with the basic functions, but will also delight hosts and guests with its unusual color and aroma. Moreover, everyone will be able to add their favorite scent to their creation by using different ingredients. If soap making hasn't become one of your hobbies yet, a master class with a detailed description of the steps will make the first attempt easily feasible.
Required Ingredients and Equipment
Soap making is not a cheap pleasure, because any components that come across are not suitable for it. But now in every city there are specialized stores where they sell everything you need. The standard soap making kit includes:
Essential and base oils are selected based on the preferences of each needleworker, the main thing is to follow certain proportions by adding additional ingredients.
Soap making: a master class from scratch

For the first experience, making Chamomile soap is suitable. To do this, you will need a white synthetic base (100 g), "Yellow" dye, "Chamomile" fragrance, base oils, the listed utensils and a chamomile-shaped mold. You can start soap making. The master class for beginners includes the following steps:
- The soap base is cut into pieces and melted in a water bath or in a microwave. The main thing is not to let the mass boil.
- A small part is poured into a separate container and 1-2 drops of yellow dye are added. Mix thoroughly with a stick.
- Then 2 drops of fragrance are added to the colored mass.
- A little yellow base is poured into the middle of the mold and allowed to harden. The excess is carefully removed, sprinkled with alcohol.
- Add 4 drops of flavoring to the white base, mix.
- Pour into the mold over the yellow layer to the brim. After hardening, which sometimes takes up to a day, the soap is removed from the mold. It is ready to use.
Multilayer products

When creating homemade soap, you can combine different colors, shades, smells. For example, the liquid base is poured into soap molds in layers, like rainbow jelly. But with such an interesting combination, you can further diversify products by adding patterns. Smooth on the surface and throughout the depth of the soap are called swirls. Each bar will be different from the previous one, and this technique is good. Swirl soap making (a master class will be given below) is within the power of every beginner.
How soap patterns are created
We will describe the partitioning method, which allows you to create multi-colored swirls in the soap. For this you will need:

Partitions should be well strengthened, fixed with side walls so that the colors do not mix ahead of time. you need to melt, add the cooked oils, water, sodium hydroxide, mix thoroughly. Divide into 3 parts, pour different dyes into each container. All mixtures must be poured at the same time, so the help of a second person will be needed here. When the surface is leveled, slowly and carefully remove the partitions. Take a glass rod or spoon, and with the reverse side drive from one edge of the "loaf" to the other along the bottom of the mold (a zigzag line is obtained). Do not rush, the appearance of the finished product will depend on the quality of mixing the layers. The surface of the soap is sprayed with alcohol, covered with a film and left to dry for a day. When the bar has frozen, it is taken out and cut with a knife into equal parts. Then each piece is divided into two halves, sawing across. It turns out about 10 bars of fragrant, unusually beautiful soap, which is nice to use at home or give to friends.
Baby soap

If you want to pamper the kids, but you are afraid to use synthetic substances, try soap making from baby soap. The recipes are very diverse, we chose the simplest one. He describes all the steps, and you don’t have to worry about the health of the kids. So, you will need:
- a bar of baby soap;
- liquid vitamin E;
- apricot oil;
- sweet orange essential oil;
- dye;
- fill form.
The soap is rubbed on a coarse grater, the resulting shavings are placed in a saucepan in a water bath. Constantly stir. When the soap begins to melt, milk is poured into it in a thin stream so that the consistency is like that of thick sour cream. The mass should not boil. Part is transferred to a plastic cup, half a teaspoon of apricot oil is mixed in. Add 1 drop of vitamin E, then essential oil, and at the very end - dye, mix with a stick. The mold for soap is lubricated with vegetable oil, the prepared mixture is poured into it. The surface is sprayed with alcohol. It will harden in the form from 20 minutes to 3 hours, but it will be completely ready for use in 2 days.
How soap scrub is made
To give the soap exfoliating properties, natural ingredients are added to the bulk: oatmeal, honey, ground coffee or fruit seeds. We suggest using foundation, it fits well into the soap making process.
Scrub making master class

They take a form, lay a thin layer of prepared, pre-cut foundation on the bottom, level it. The synthetic base is cut into pieces and melted in a water bath. At this time, base oils are mixed (including castor oil to increase foaming), dyes. For 100 g of the base put 1 tsp. oils. These ingredients are poured into the melted mixture, mixed and cooled slightly. After that, the base is poured into the mold and sprinkled with alcohol on it. The temperature should not be high so that the foundation does not burst. After 1-2 hours, the surface is scratched with a knife and treated with alcohol. Prepare a second layer of organic soap base by adding dyes, castor oil, titanium dioxide (makes it hazy), essential oils or fragrances. Mix everything thoroughly, cool slightly and pour over the first layer. Spray with alcohol and wait for complete solidification.
Precautionary measures
If you decide to master soap making, master classes in this are excellent helpers. But in this process, you should follow a few rules:

Expanding the boundaries of possibilities
Over time, having mastered the technique of soap making, you will be able to improvise, try unusual color and aromatic combinations, use non-standard forms. For example, the addition of various essential oils or significantly improves the condition of the skin, cares, nourishes and moisturizes. This is such an interesting occupation - soap making. A master class, step-by-step photos and tips for beginners - this article has all the necessary data, so try, create and fantasize.
Related Articles


